Debian 9 - Manual installation with root filesystem on /dev/vdb
Start the Boot Image
First login to the control panel: https://my.virtualhosts.de/cloud/
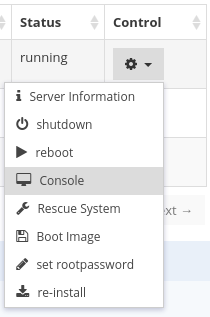
After you have logged in, choose your VPS, click on the gear symbol and then click on “Boot Image”
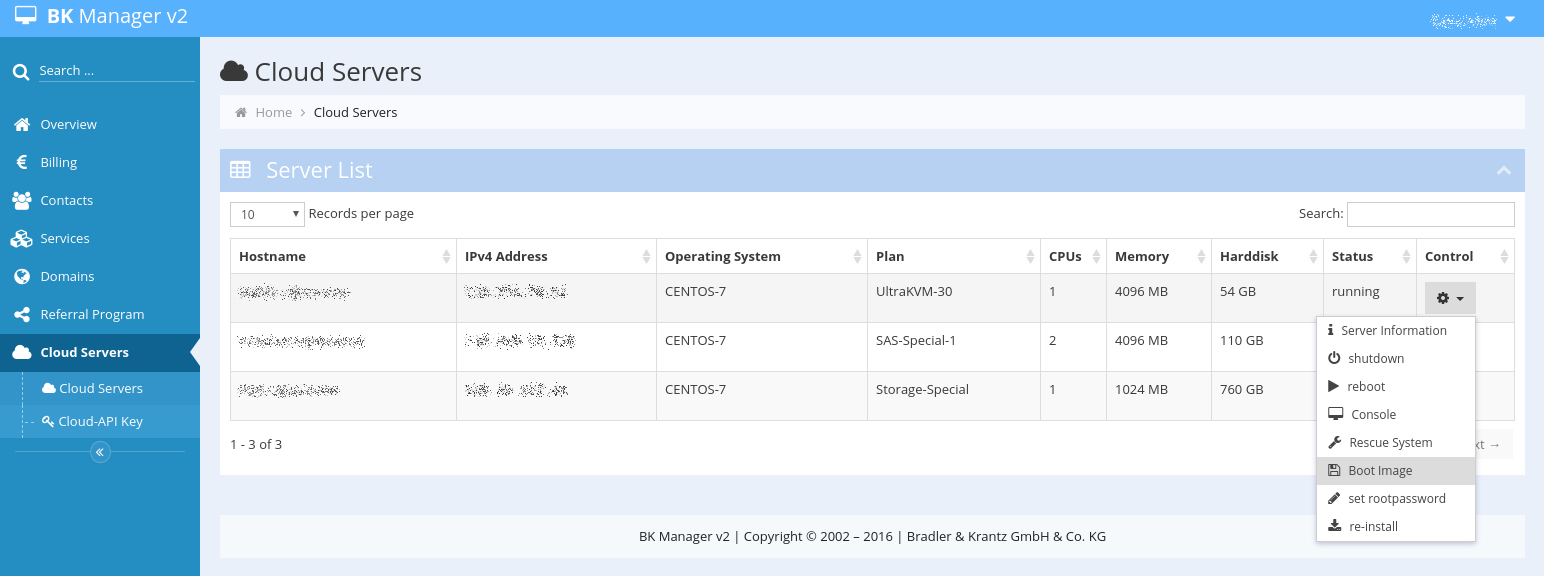
Now you see a list of available boot images. Choose “Debian 9.6 64-bit Netinstall”. The VM will now reboot and load the installation image. After the VM has booted and is running, you can open the console
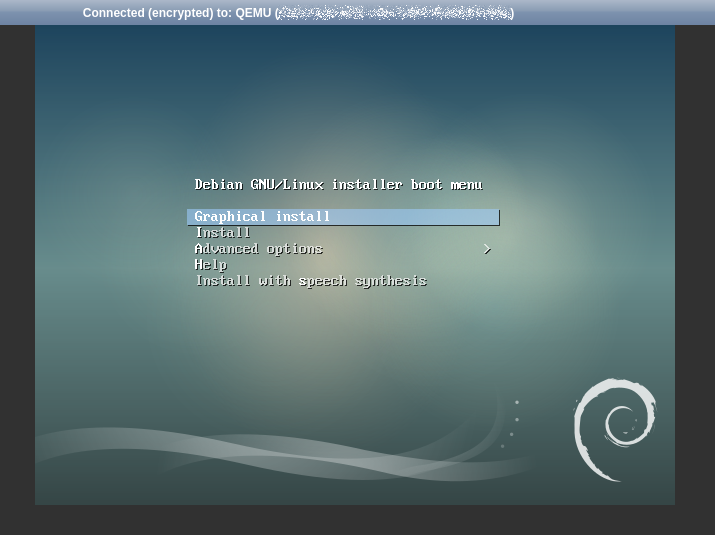
If the boot image is loaded you should see this in your console:
Debian 9 installation
- Select “Install” to start the installation. You will be asked for your “language”, “region” and “keyboard” layout. Please set these as you like. After that some components will be loaded.
- Then you will be asked for the hostname. You should choose a FQDN like server-123.example.net
- After the hostname is set, you are being asked to set the root password and an additional user. The additional user ist for your SSH logins, as direct root logins are prohibited. Both passwords should be strong.
Partitioning
IMPORTANT
Before we start, please keep in mind that the VM can only boot from /dev/vda. Later you will be asked where to install the boot loader. Always use /dev/vda for the boot loader!
IMPORTANT
Now we will partition your VPS:
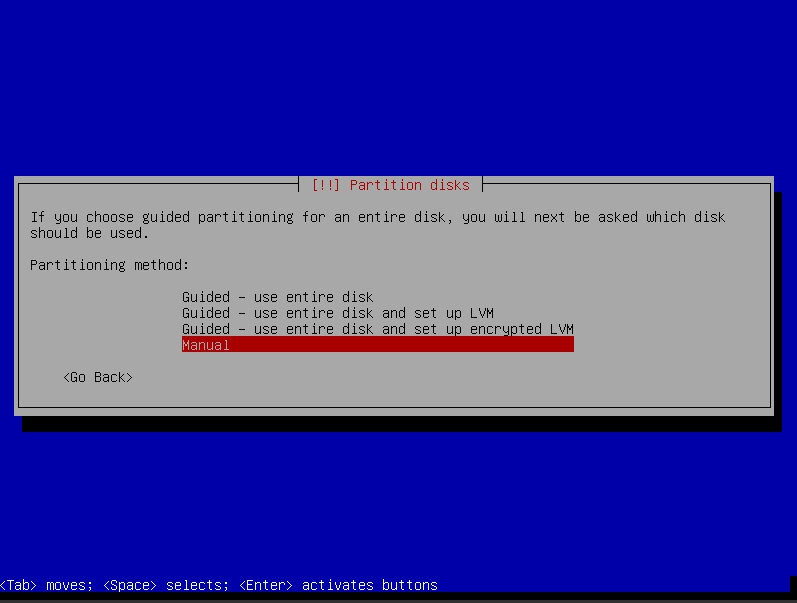
Choose “manual” for manual partitioning. After you have chosen “manuel”, you will see the current partitions, which should look like this:
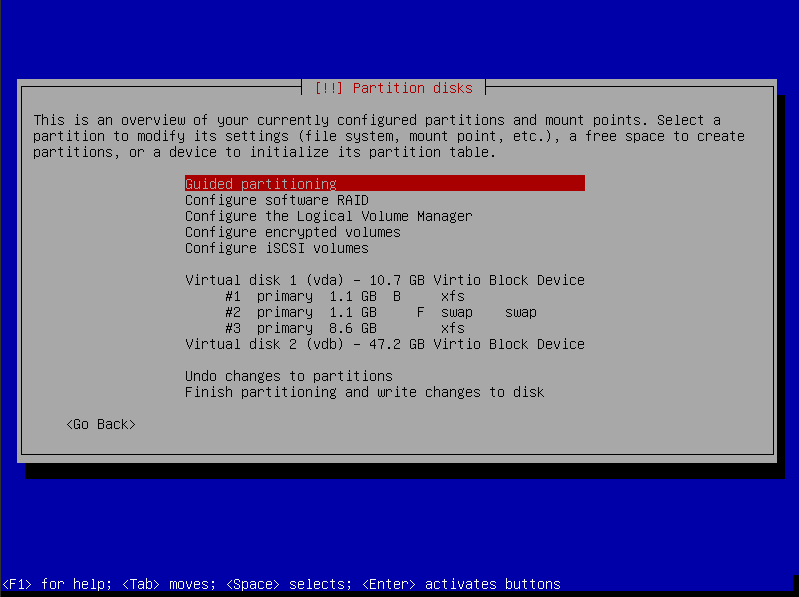
Now go down and select a partition. These are marked with #1, #2, etc. Hit “Enter” and choose to delete the partition. Repeat this until none is left and only free space is available. If there is no free space shown on /dev/vdb you will be asked if you like to create an empty partition table.
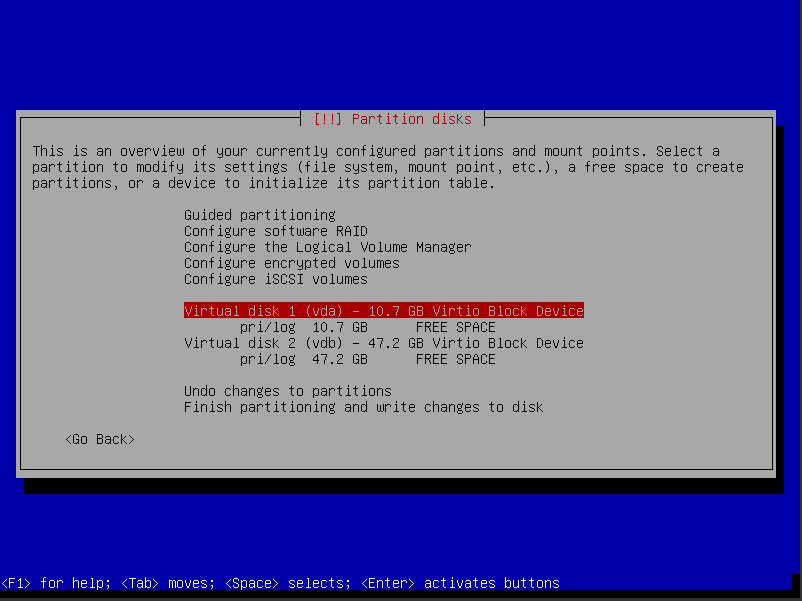
If no partition is left, we need to create ours. You can freely choose how to partition. In this guide we will give an example on how to install Debian 9 on /dev/vdb:
| No. | mount point | filesystem | disk | type | bootable |
|---|---|---|---|---|---|
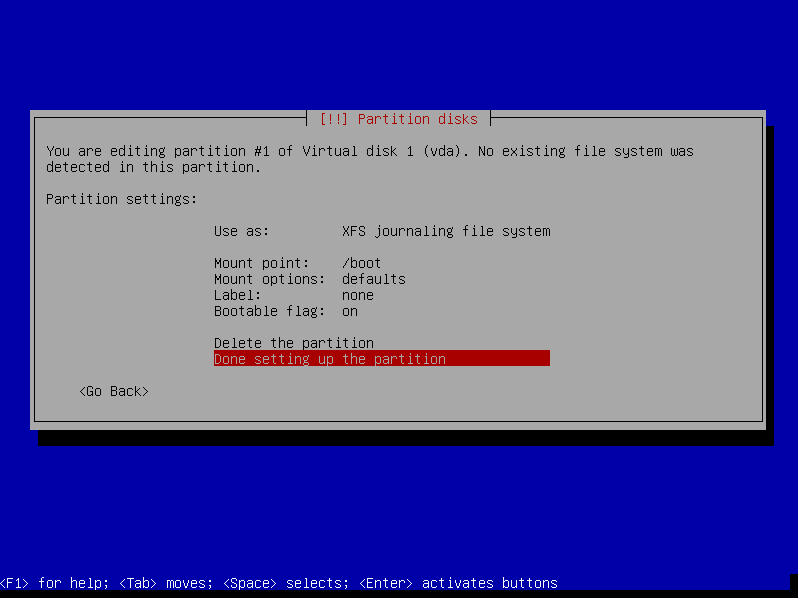
| #1 | /boot | xfs | /dev/vda | primary | On |
| #2 | swap | swap | /dev/vda | primary | Off |
| #3 | / | xfs | /dev/vdb | primary | Off |
| #5 | /usr | xfs | /dev/vdb | logical | Off |
| #6 | /home | xfs | /dev/vdb | logical | Off |
Of course you don’t need to create separate partitions for /usr and /home. If you only have partition #1 to #3 created /usr and /home will automatically located in partition #3. Only /boot should be located onto /dev/vda, together with the boot loader.
Upon creating a new partition you will be aked about:
- capacity: how large should the partition be
- partition type: primary or logical. The root / partiton is typical primary, /home can be logical
- start of the partition: beginning or ending. Choosing “beginning”, the partition will be created on the first free bit.
- filesystem: you can choose between several filesystems. Usually XFS or EXT4 are good choices
- mount point: set where the partition should be mounted
- bootable: choose yes or no. Usually only /boot needs to be bootable.
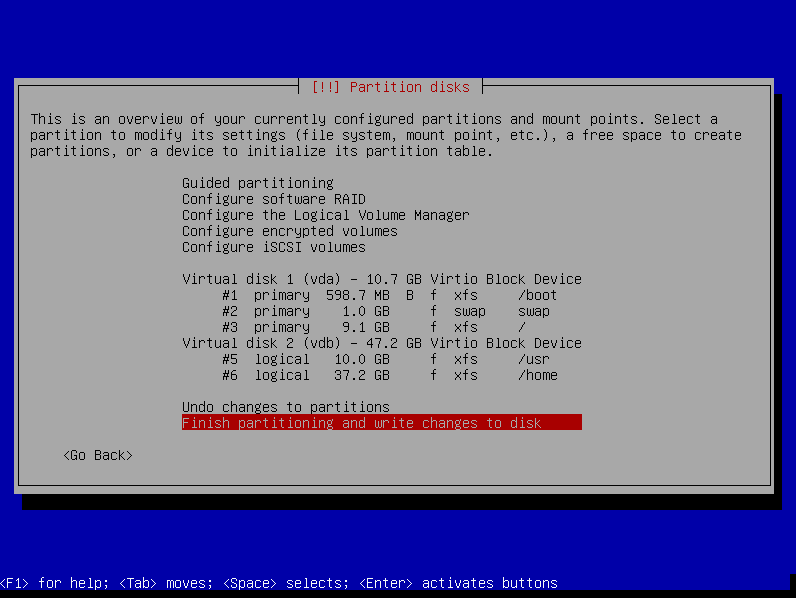
After you are done with partitioning, you can finish partitioning and write changes to the disk. This will erase all data on the disks.
Now you can go on with the installation:
- You will be asked to scan for additional CD-ROMs, this can be answered with “NO”.
- APT needs to be configured. Choose a mirror server. The http proxy can be left empty.
- Upon reaching “software selection” it is important to select “SSH server” in order to be able to connect via SSH to your VPS.
IMPORTANT
Now you will be asked if you want to install the GRUB boot loader to the master boot record. Answer this question with “yes” and choose “/dev/vda” as location.
IMPORTANT
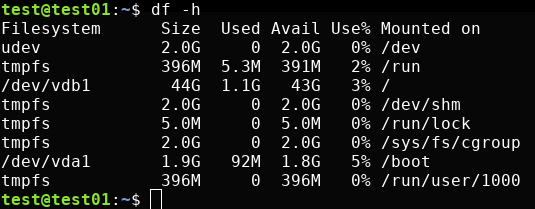
The installation will now finish and reboot the server. After the VPS has booted, you will see a login prompt. If you have installed the “SSH server” you can now conntect to you server via SSH and check your partition.
Network configuration
The IPv4 configuration will be automatically configured. Only IPv6 needs to be configured additionally.
The usable IP addresses and necessary information about the network configuration (such as IP addresses or gateway address) can be found in our customer portal:
https://my.virtualhosts.de/cloud/ => Control => Server Information => IPv4/IPv6 Settings
To change the network configuration, please edit the file /etc/network/interfaces as in the example below:
auto lo
  iface lo inet loopback
auto eth0
  iface eth0 inet dhcp
  pre-up echo 0 > /proc/sys/net/ipv6/conf/eth0/accept_dad
 iface eth0 inet6 static
 address 2a02:e00:fffx:13e::1/64
 iface eth0 inet6 static
 address 2a02:e00:fffx:13e::2/64
 ...
 iface eth0 inet6 static
 address 2a02:e00:fffx:13e::a/64
    up ip -6 route add 2a02:e00:fff0::1 dev eth0
    up ip -6 route add default via 2a02:e00:fff0::1